Getting Started with MetaMonster
Learn how to automate your SEO grunt work and analyze content at scale with MetaMonster. This guide walks you through your first workflow from crawling to exporting optimizations.
MetaMonster helps you automate all of your least favorite SEO grunt work and analyze content at scale. Let the robots do the boring, tedious stuff - freeing you up to focus on the strategic, human work that moves the needle for your clients.
This guide walks you through a basic MetaMonster workflow - as you follow along you’ll:
- Crawl your first site
- Learn to navigate the pages table
- Identify the keywords AI thinks your pages target
- Find pages with keywords missing from key metadata
- Generate page titles, meta descriptions, and H1s
- Generate image alt text, structured schema, and internal link suggestions
- Use the SEO chat agent for advanced analysis
- Export your optimizations
Step 1: Crawl your site
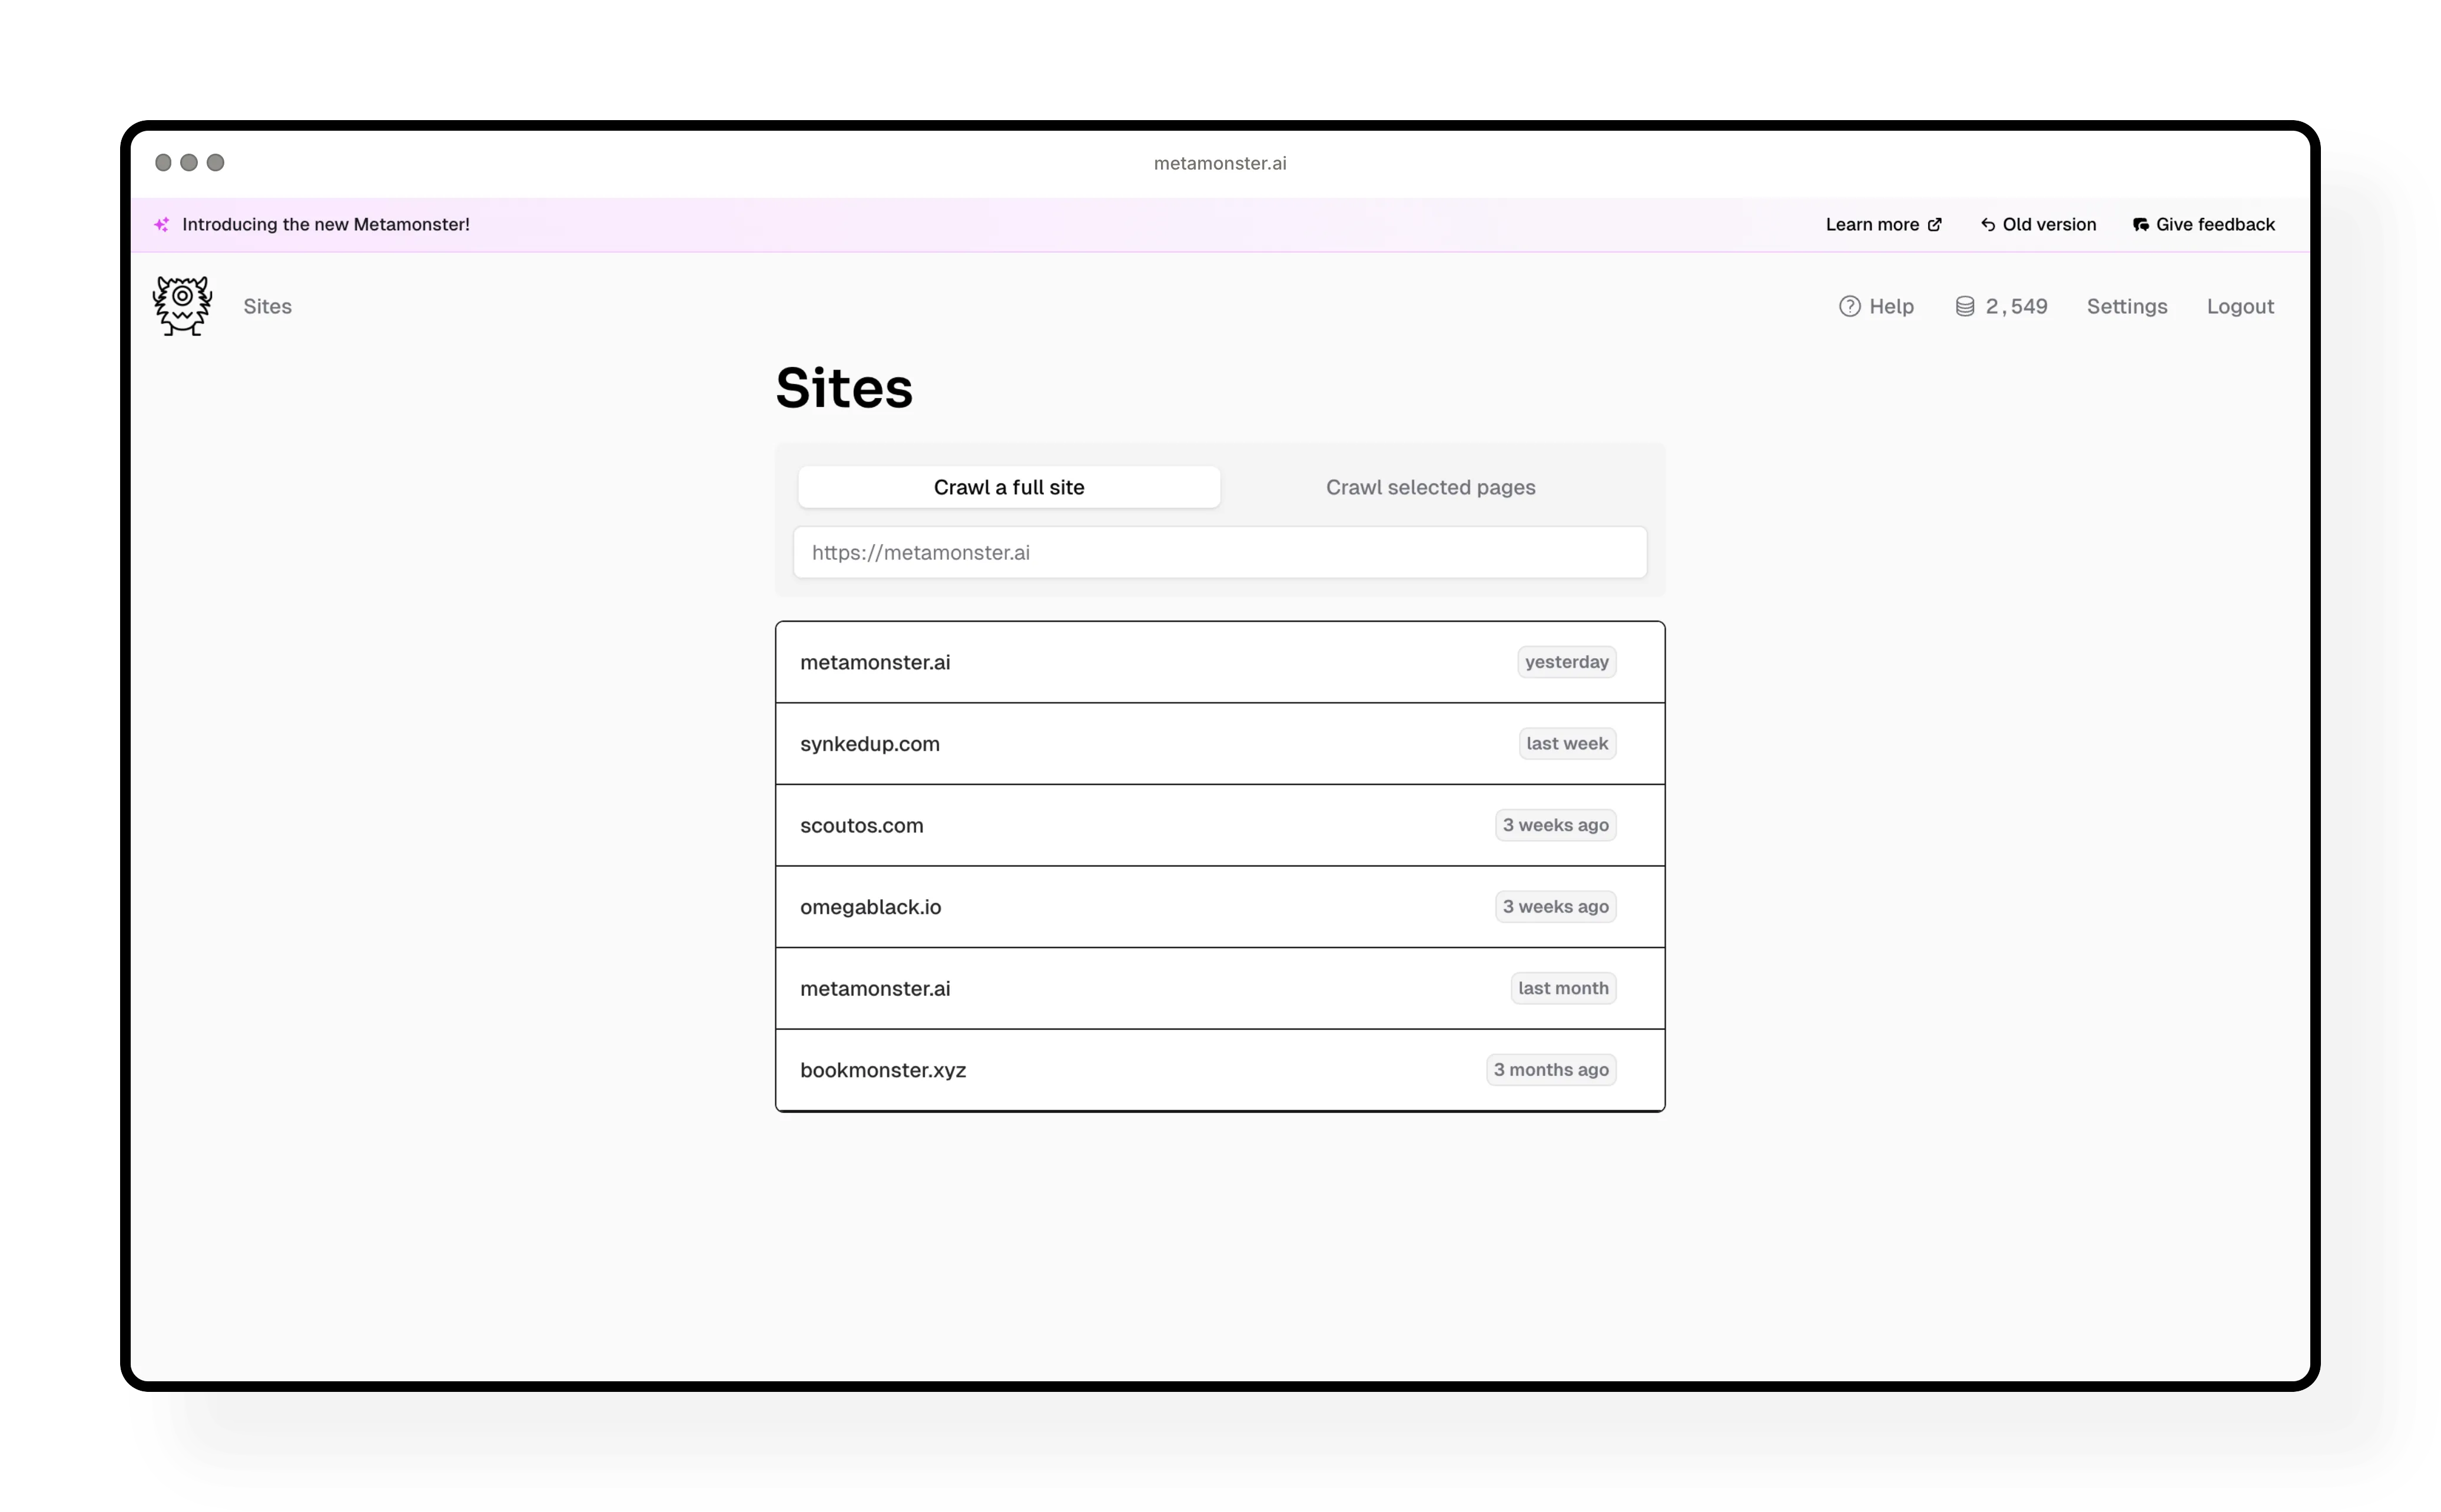
Start by getting your site content into MetaMonster. You have two options:
Full site crawl: Let MetaMonster discover all pages automatically. Just enter your URL and hit start crawling.
Selected pages: Upload a CSV with specific URLs you want to focus on. Perfect for handling larger sites in batches or targeting priority pages.
Both options include JavaScript rendering and anti-bot detection by default - no configuration needed.
Pro tip: You can limit the number of pages if you’re just testing things out or want to start small.
Step 2: Review your pages table
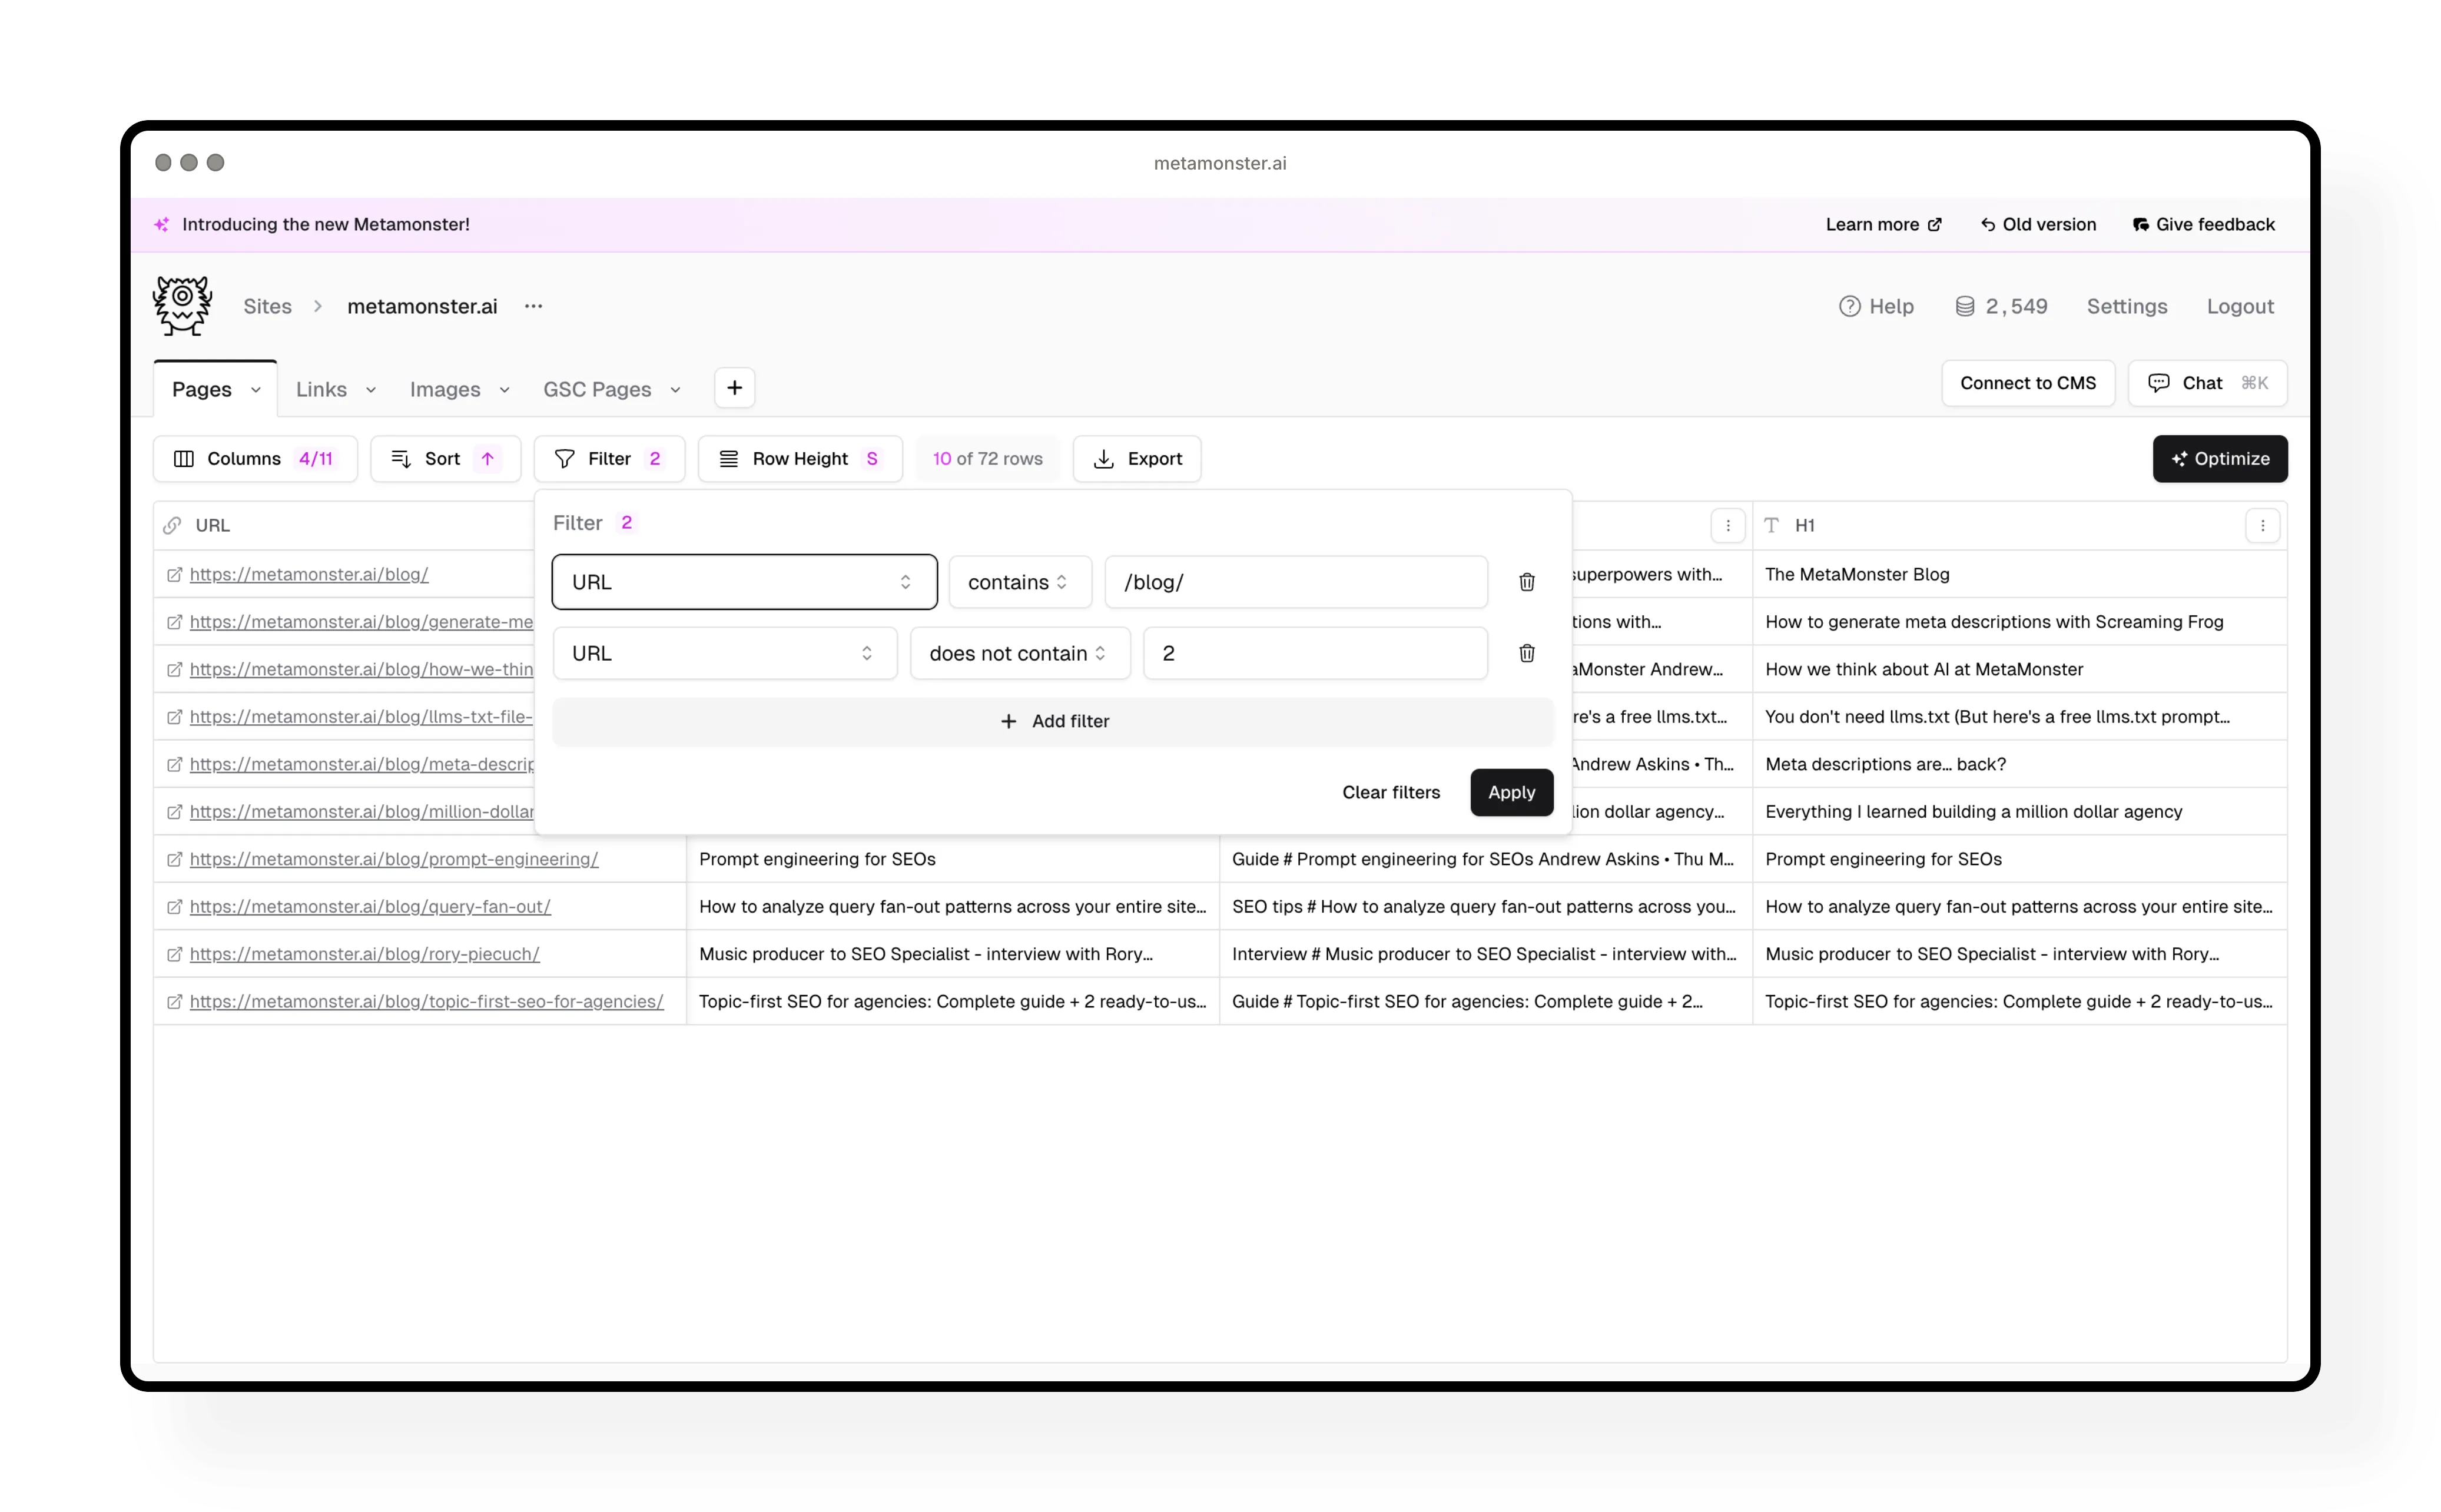
Once the crawl finishes, you’ll see all your site content organized in a spreadsheet-like table. Each page is a row, and all your SEO elements are in columns.
What you can do here:
- Hide or show columns based on what you need to see
- Sort by any column (page title, word count, URL, etc.)
- Filter to focus on specific subsets of pages
- Adjust row height for easier viewing
Try this: Filter to just your blog posts by typing /blog in the URL filter. Then add another filter to exclude any pagination pages you don’t want to work on.
Step 3: Start with primary keywords
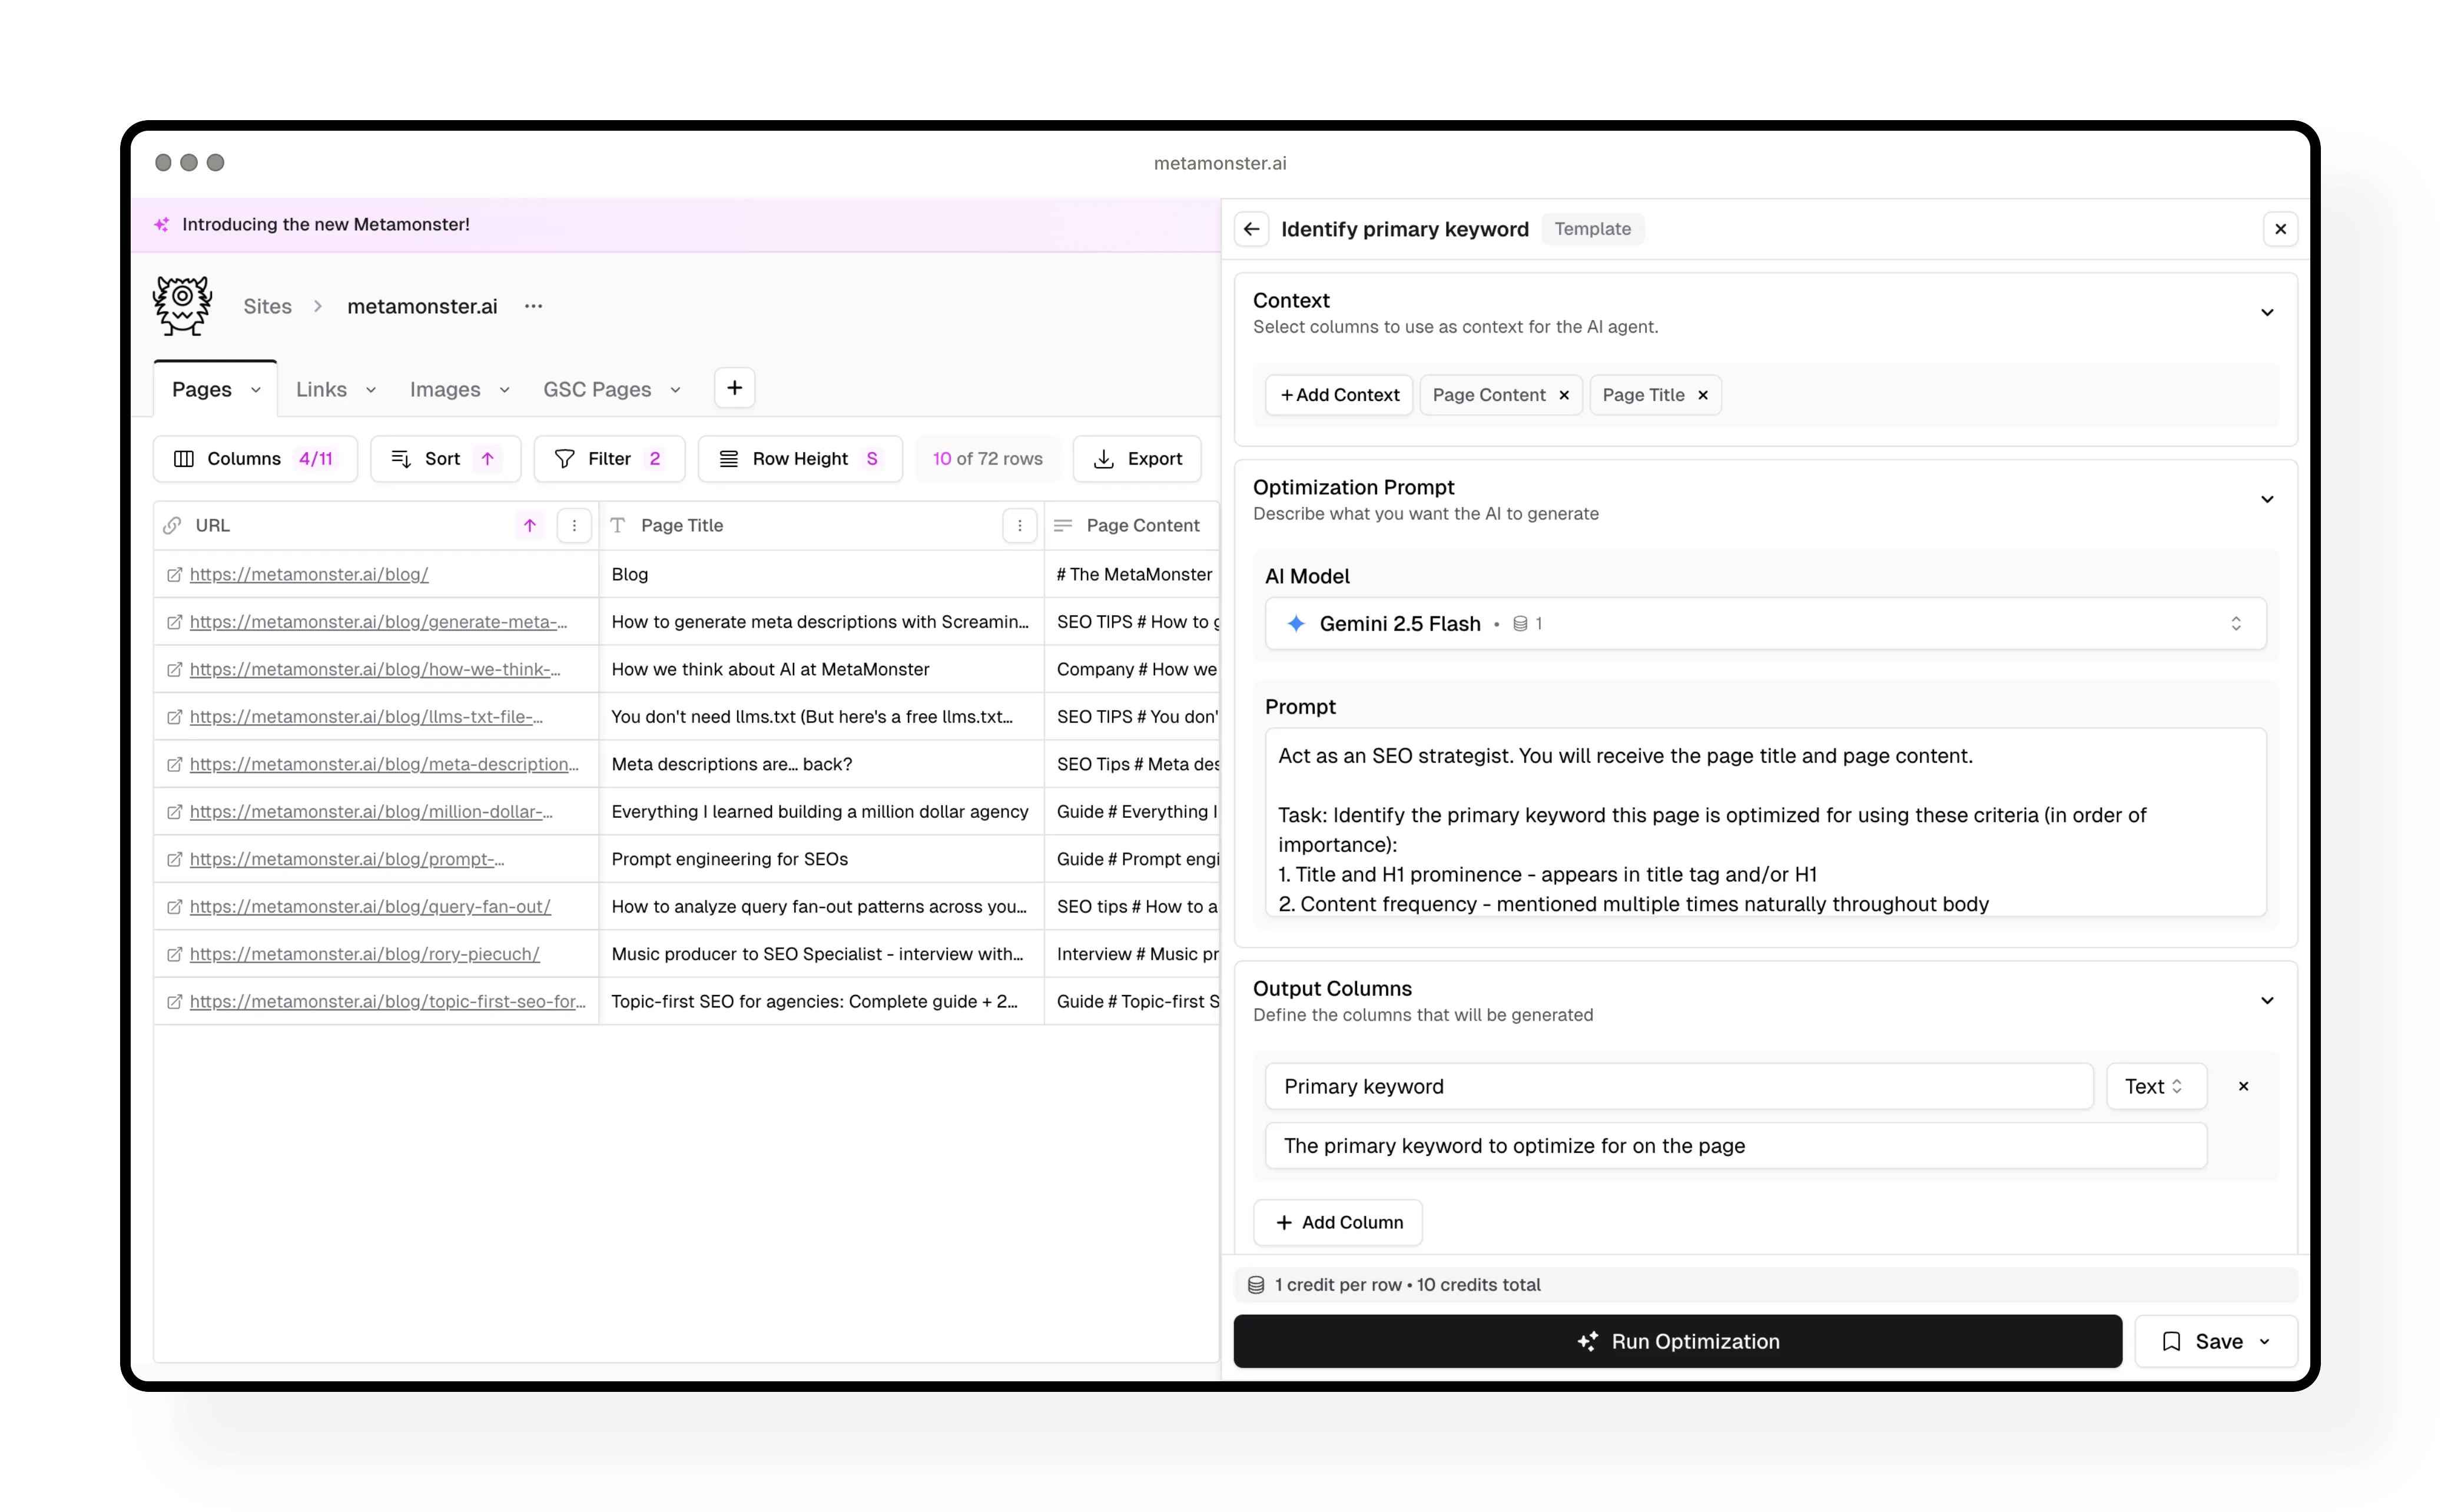
The first workflow you should run is “identify primary keyword.” This tells you what the AI thinks each page targets - which helps with every other workflow you’ll run later.
How to run it:
- Click “Run a workflow” in the toolbar (in screenshots, this may appear as “Optimize”)
- Select “Identify primary keyword” from the workflows
- Review the credit cost (shown at the bottom)
- Click “Run”
You can stop the workflow at any time if you just want to test it on a few pages - you’ll only get charged for the pages it actually runs on.
What this tells you: If the AI identifies a keyword you didn’t intend, that’s a signal your page content might need work. The primary keyword will be used in all your other workflows (titles, descriptions, schema, etc.).
Need to change something? Double-click any cell to edit it manually, or click the edit icon to open a larger text editor with a character counter.
Step 4: Check where keywords are missing
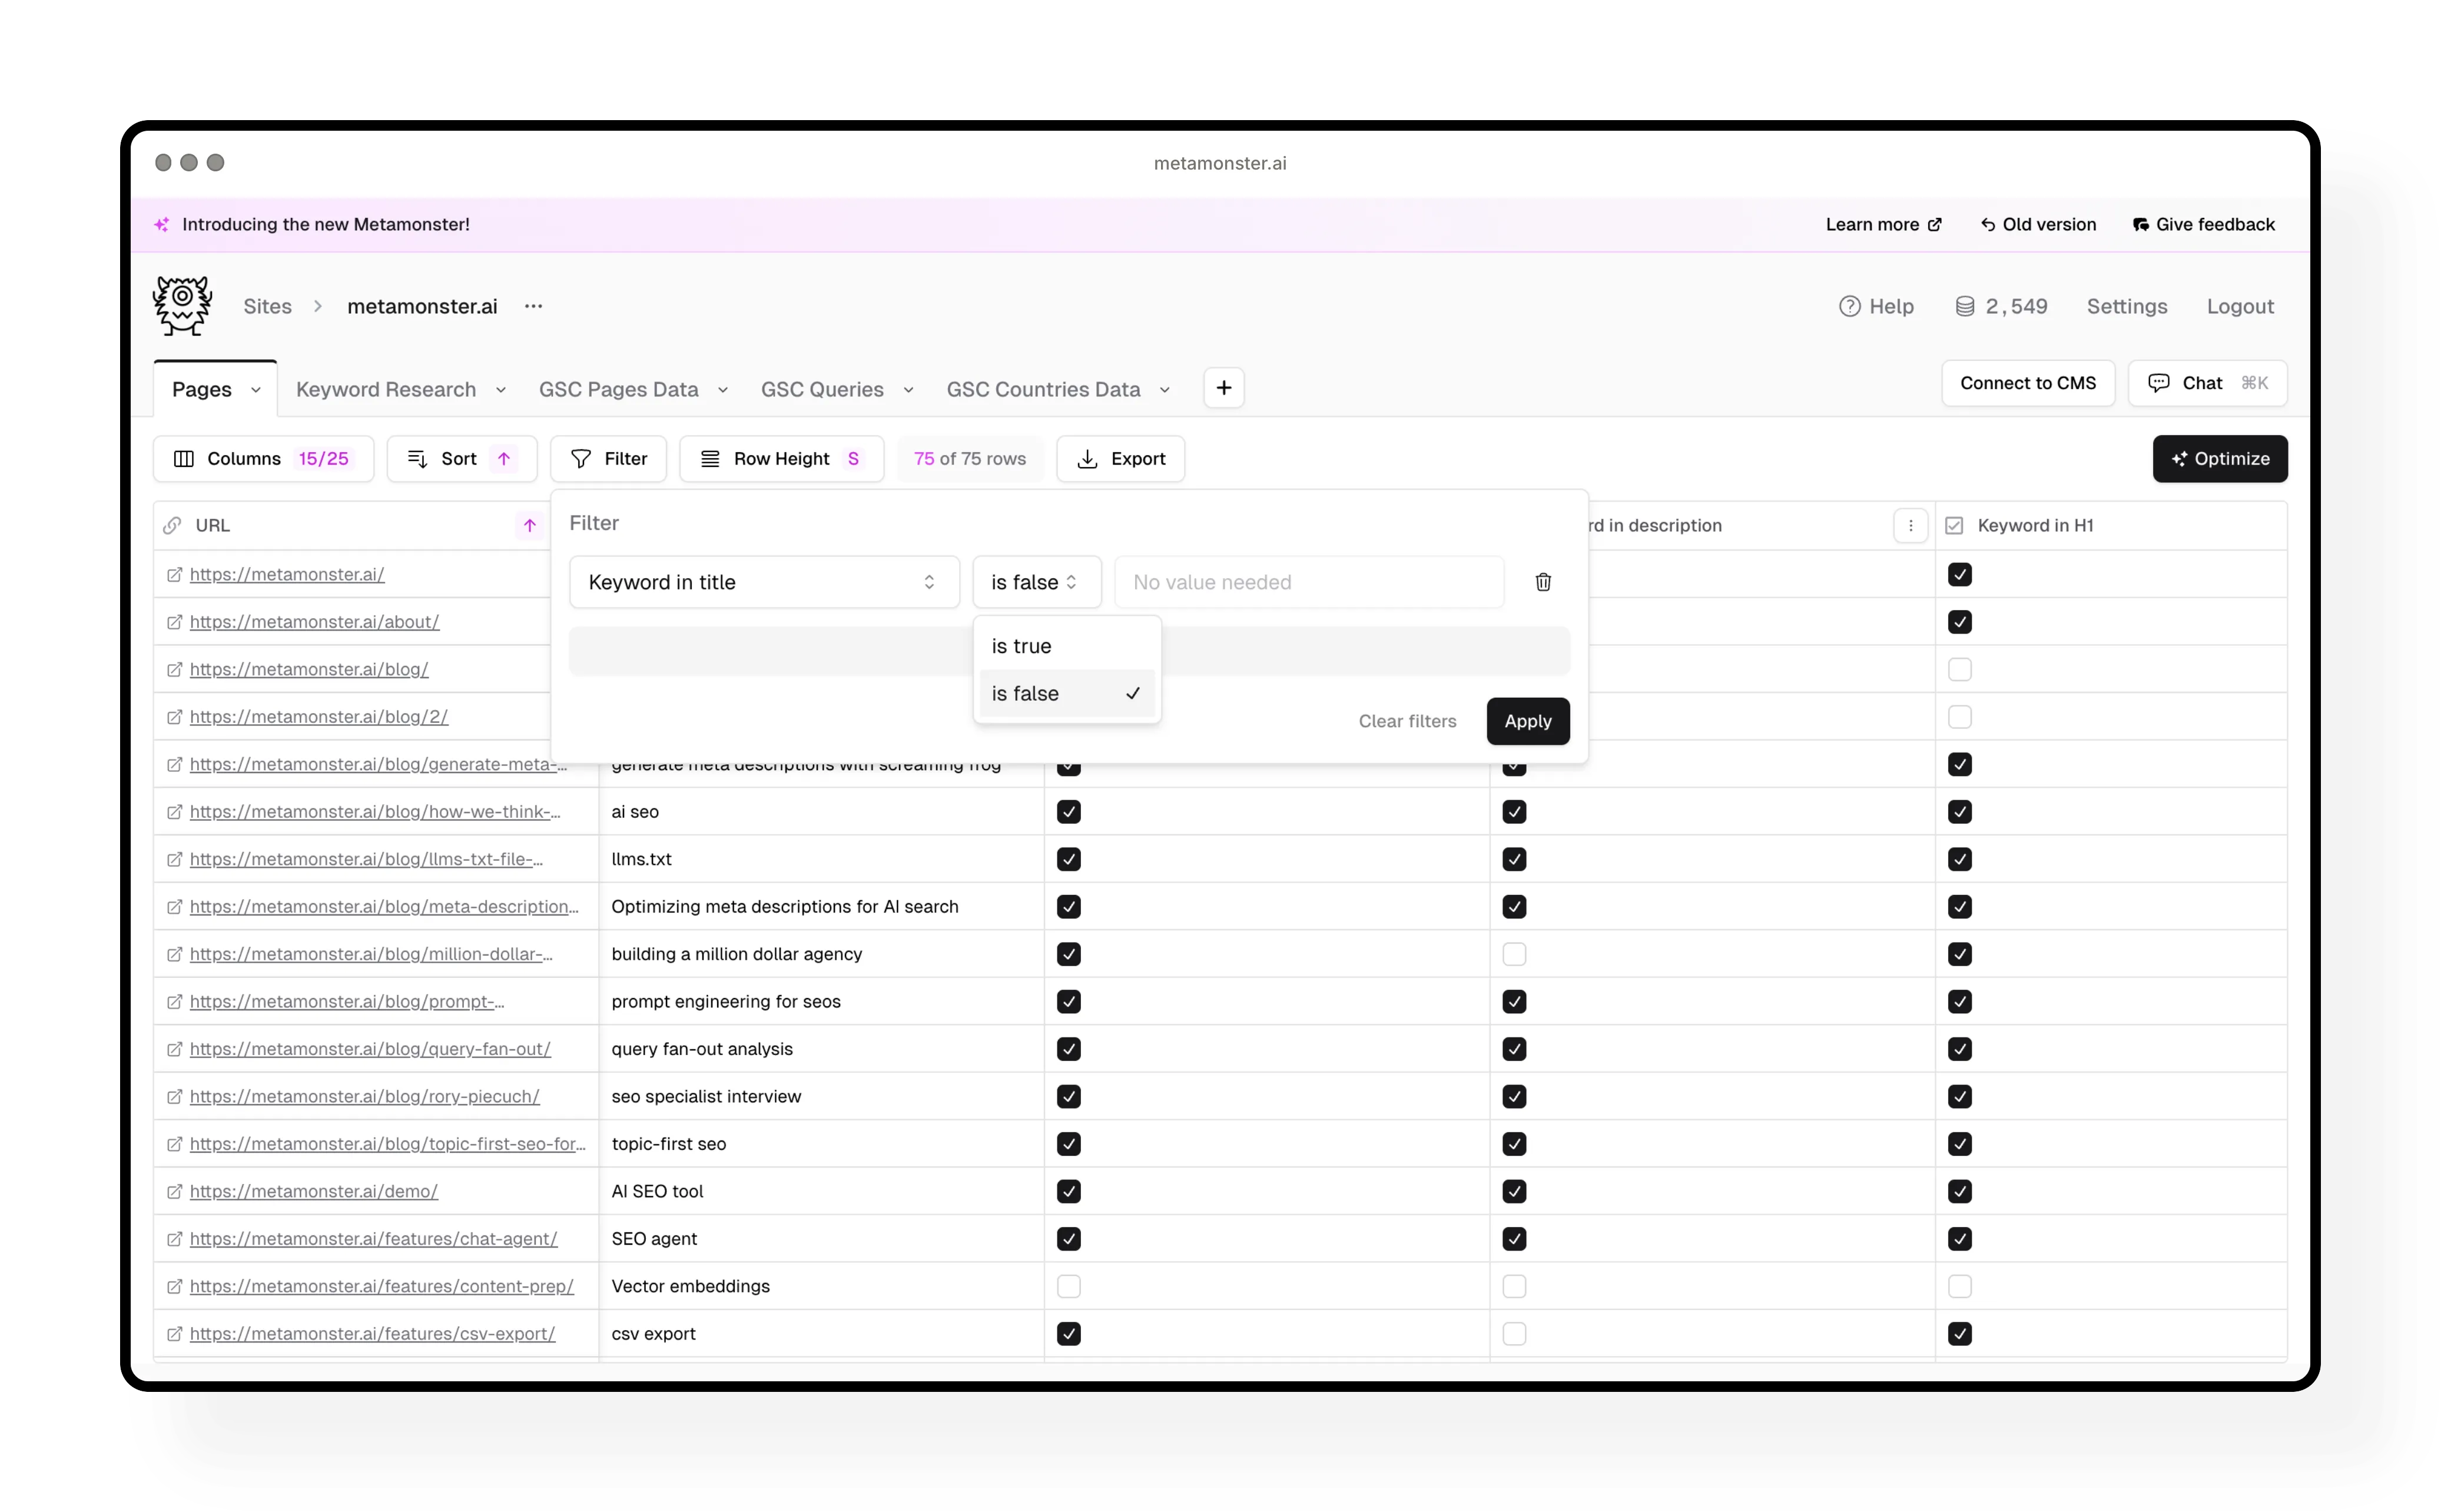
Next, run the “keyword metadata check” workflow. This shows you if your primary keyword appears in your page title, meta description, and H1.
You’ll see checkmarks for elements that include the keyword, and no checkmarks for elements that are missing it.
Why this matters: Now you can filter to find pages that are missing keywords in critical places, then generate optimized versions for just those pages.
Step 5: Generate missing metadata
Filter your pages to show only those missing keywords in specific elements. For example, add a filter for “keyword in title is false” to see pages that need new titles.
Then run a workflow:
- Click “Run a workflow”
- Select “Generate page title”
- Review the output format in the workflow
- Make any edits (like removing brand names if you don’t want them)
- Run the workflow
Repeat this process for meta descriptions, H1s, or any other elements that need work.
Common workflow: Start with primary keyword → run metadata check → filter for missing elements → run workflows → move to the next element.
Step 6: Generate images and alt text
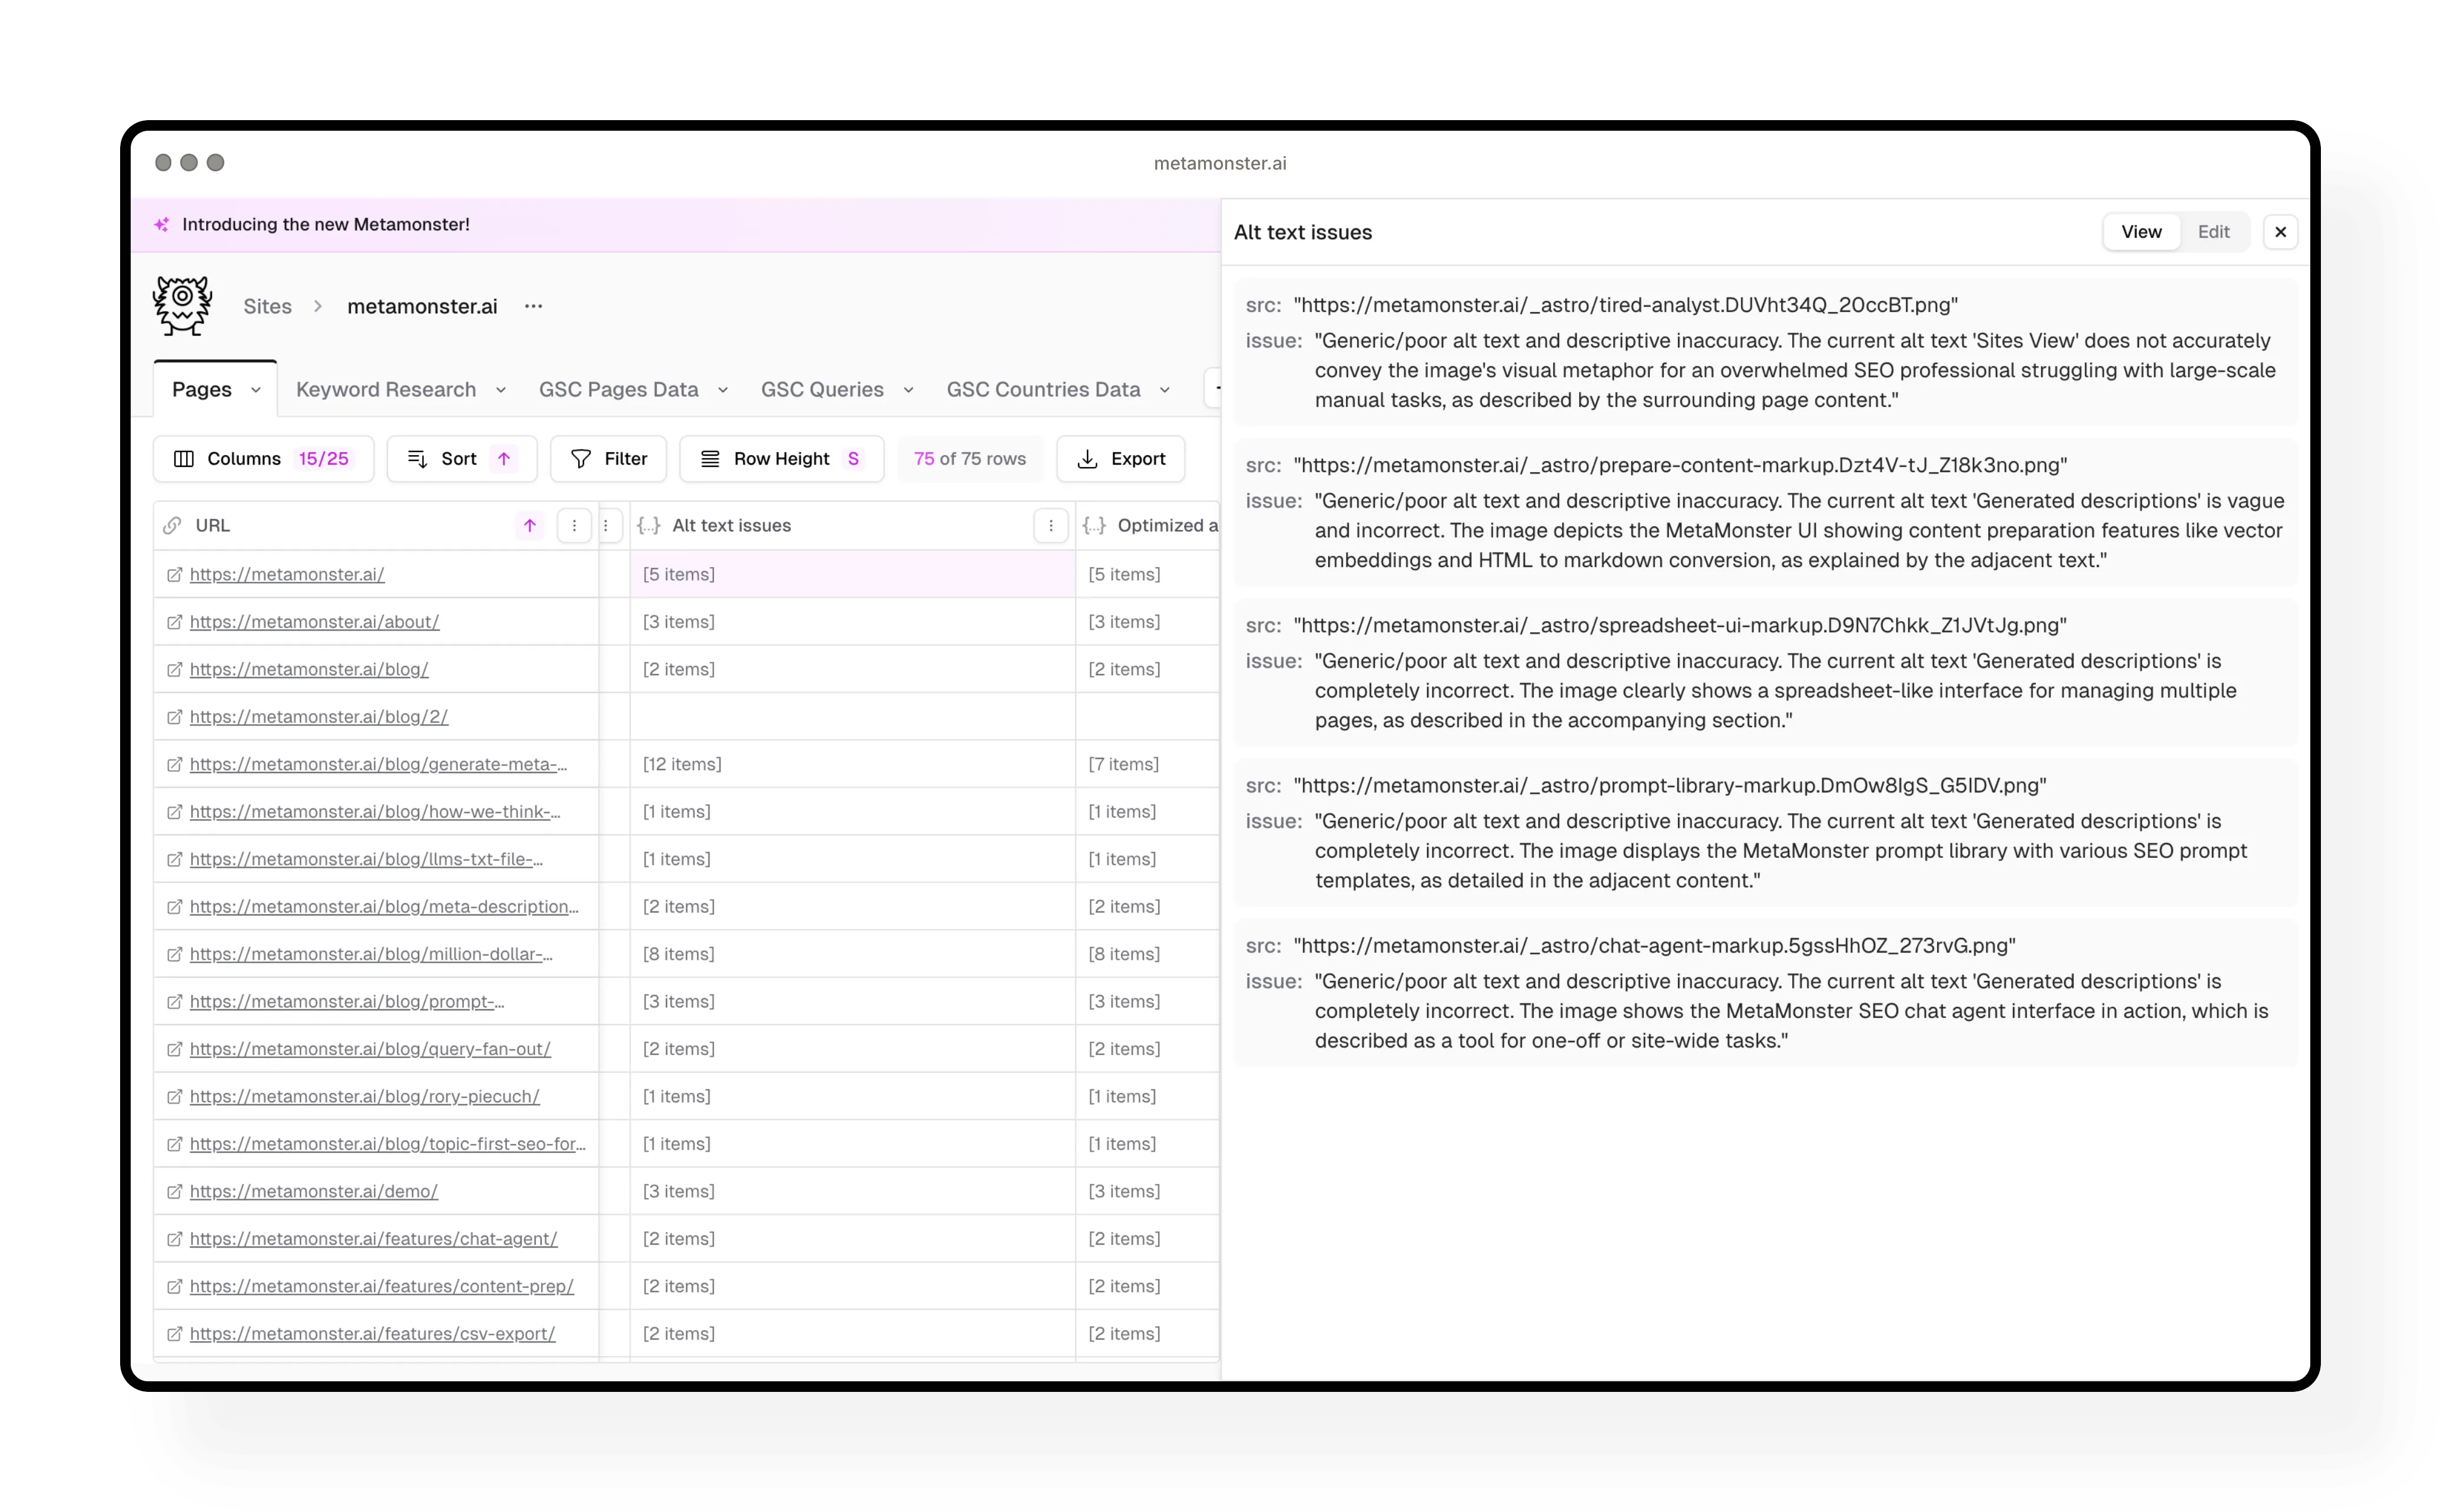
The “generate image alt text” workflow does something different - it creates two output columns at once:
- First, it identifies which images have issues (missing alt text, generic descriptions)
- Then it generates optimized alt text only for images that need it
This kind of multi-part workflow saves you time.
Recycle any cell: If you don’t like an AI output or there was an error, click the recycle icon next to that cell. It’ll regenerate just that one result.
Step 7: Add structured schema
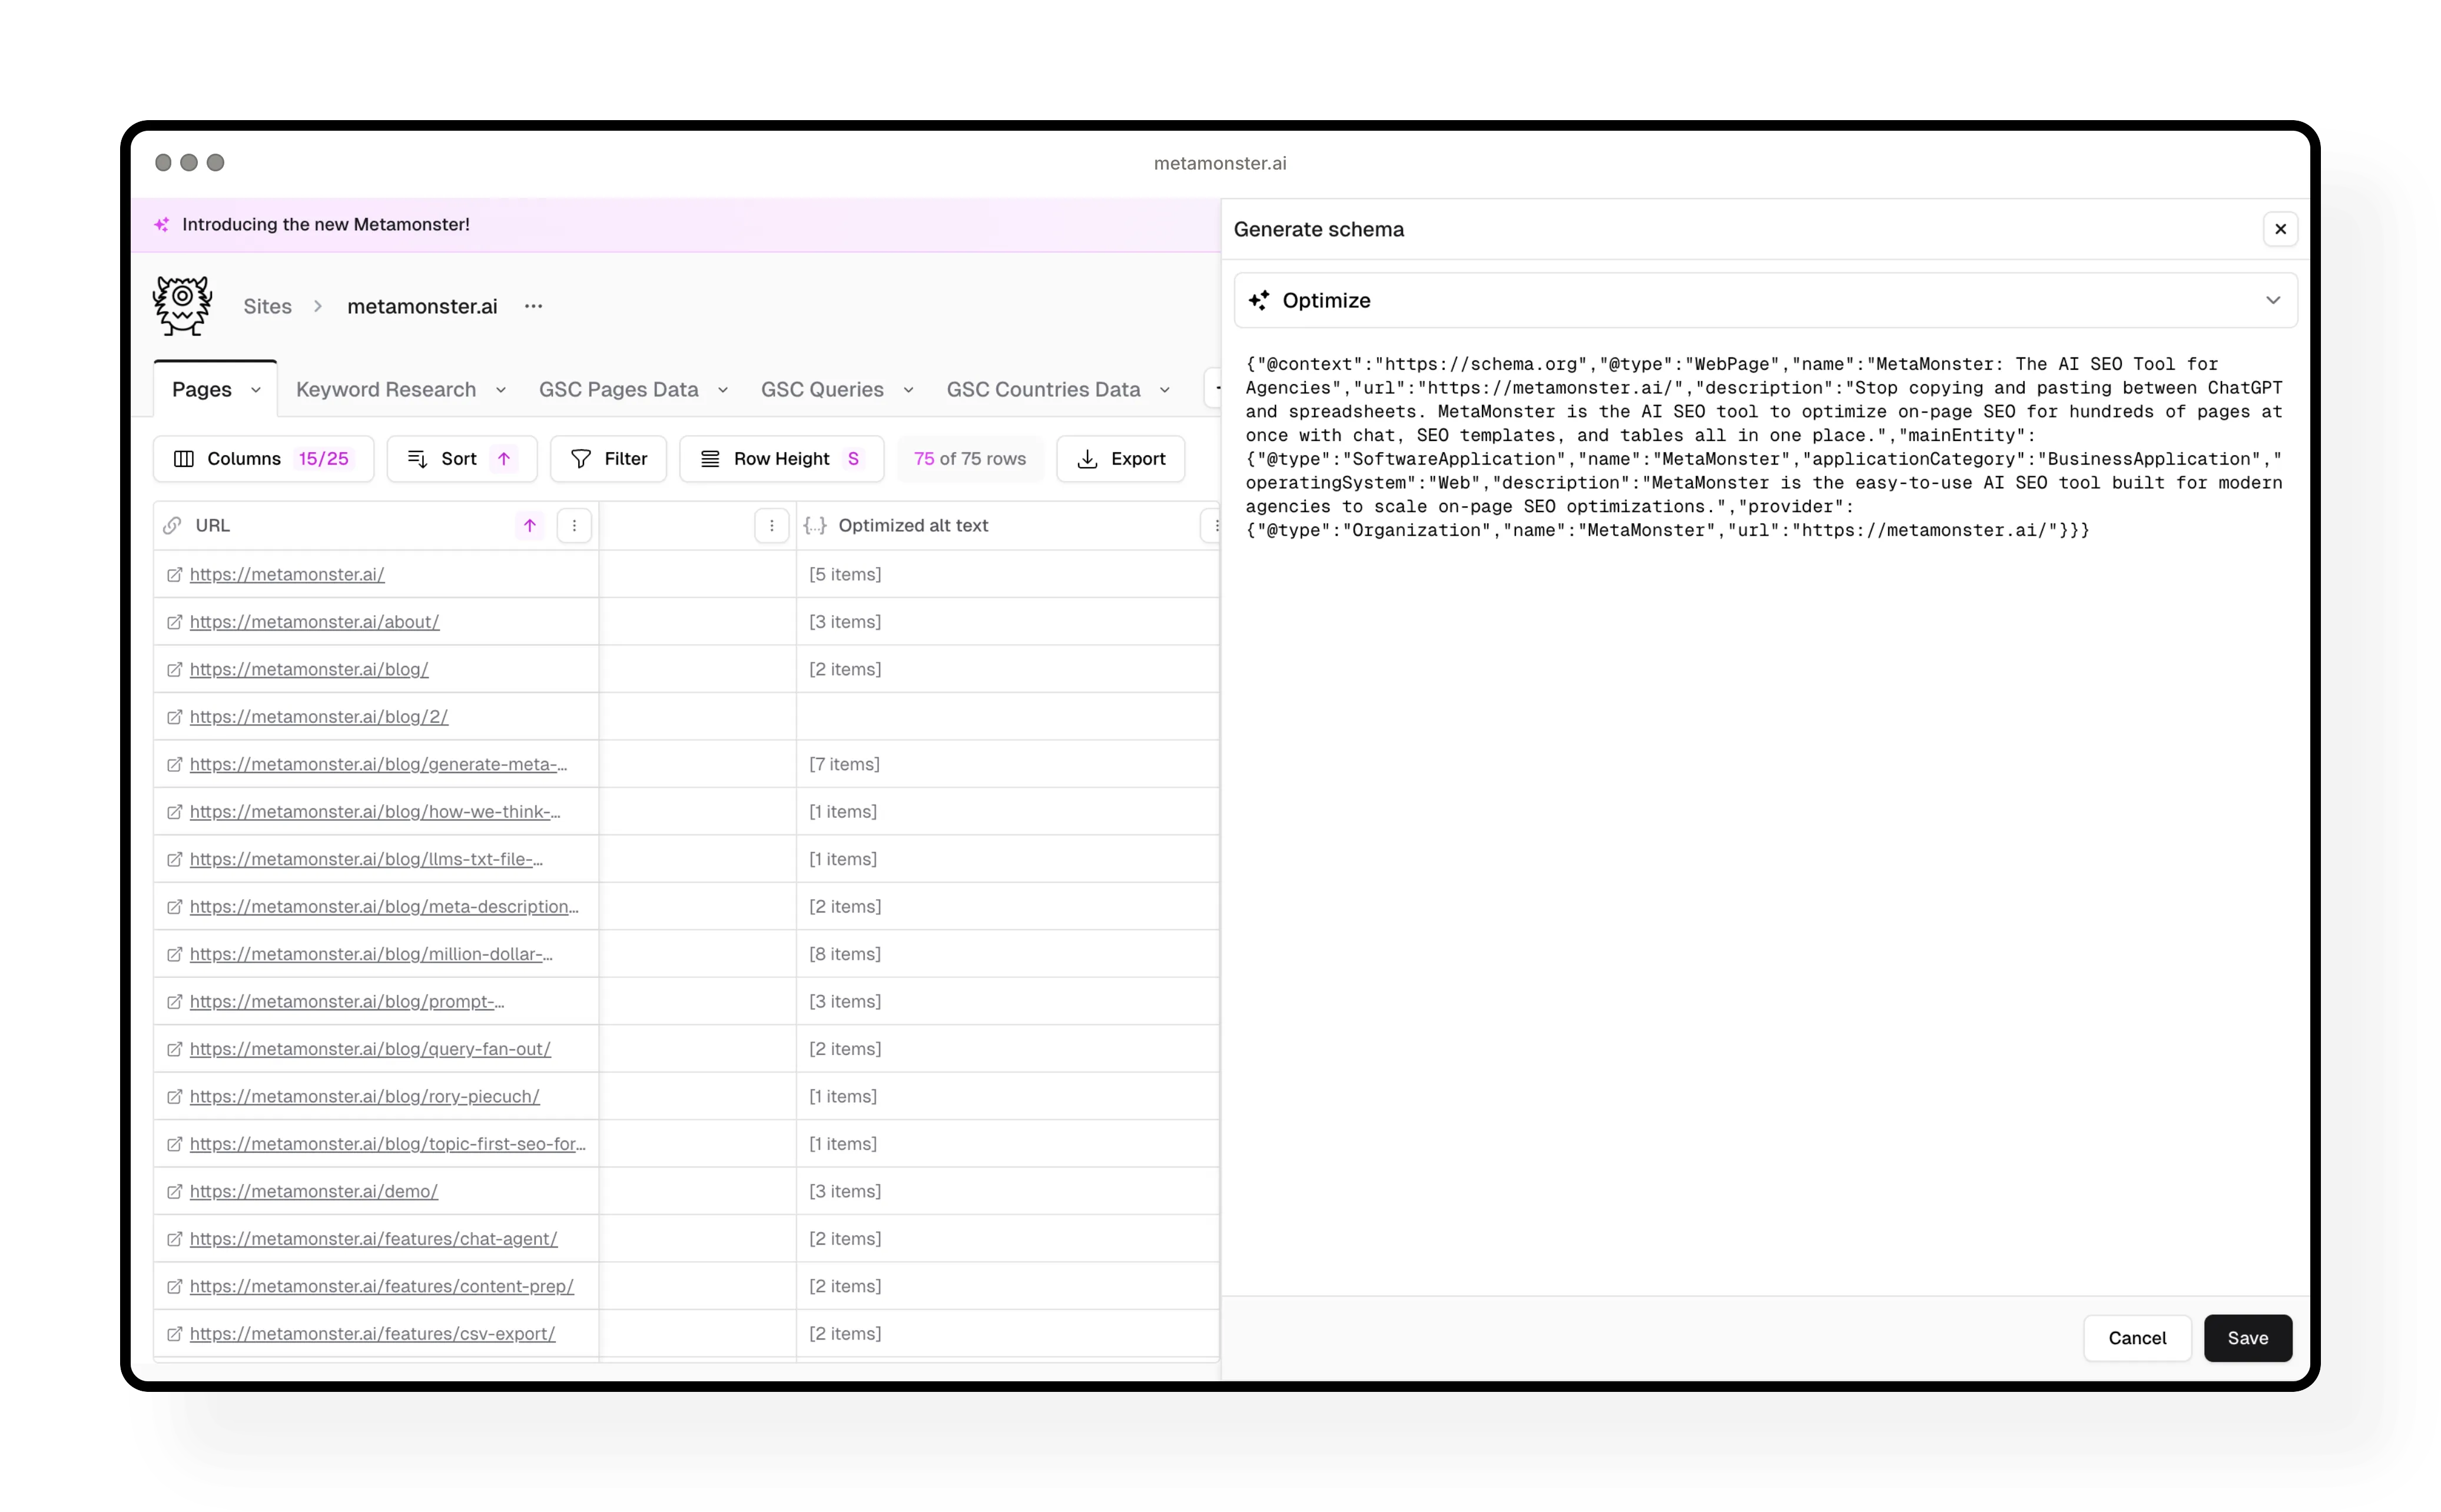
Generate structured schema markup for pages that are missing it. The workflow creates clean JSON-LD that’s ready to implement.
Best practice: Filter to only pages missing schema before running this workflow. Open up the generated schema to review it, make any edits you need, then you’re good to go.
Why schema matters: It helps search engines and AI systems understand your content better. It’s considered best practice for both traditional and AI search.
Step 8: Generate internal link suggestions
The internal linking workflow looks at primary keywords across your entire site and suggests where to add links based on content relationships.
Important note: This workflow works best after you’ve already generated primary keywords for all pages on your site, not just the subset you’re currently viewing.
Step 9: Use chat for advanced analysis
The chat agent is perfect for one-off tasks or site-wide analysis that needs context from your entire site.
What you can do in chat:
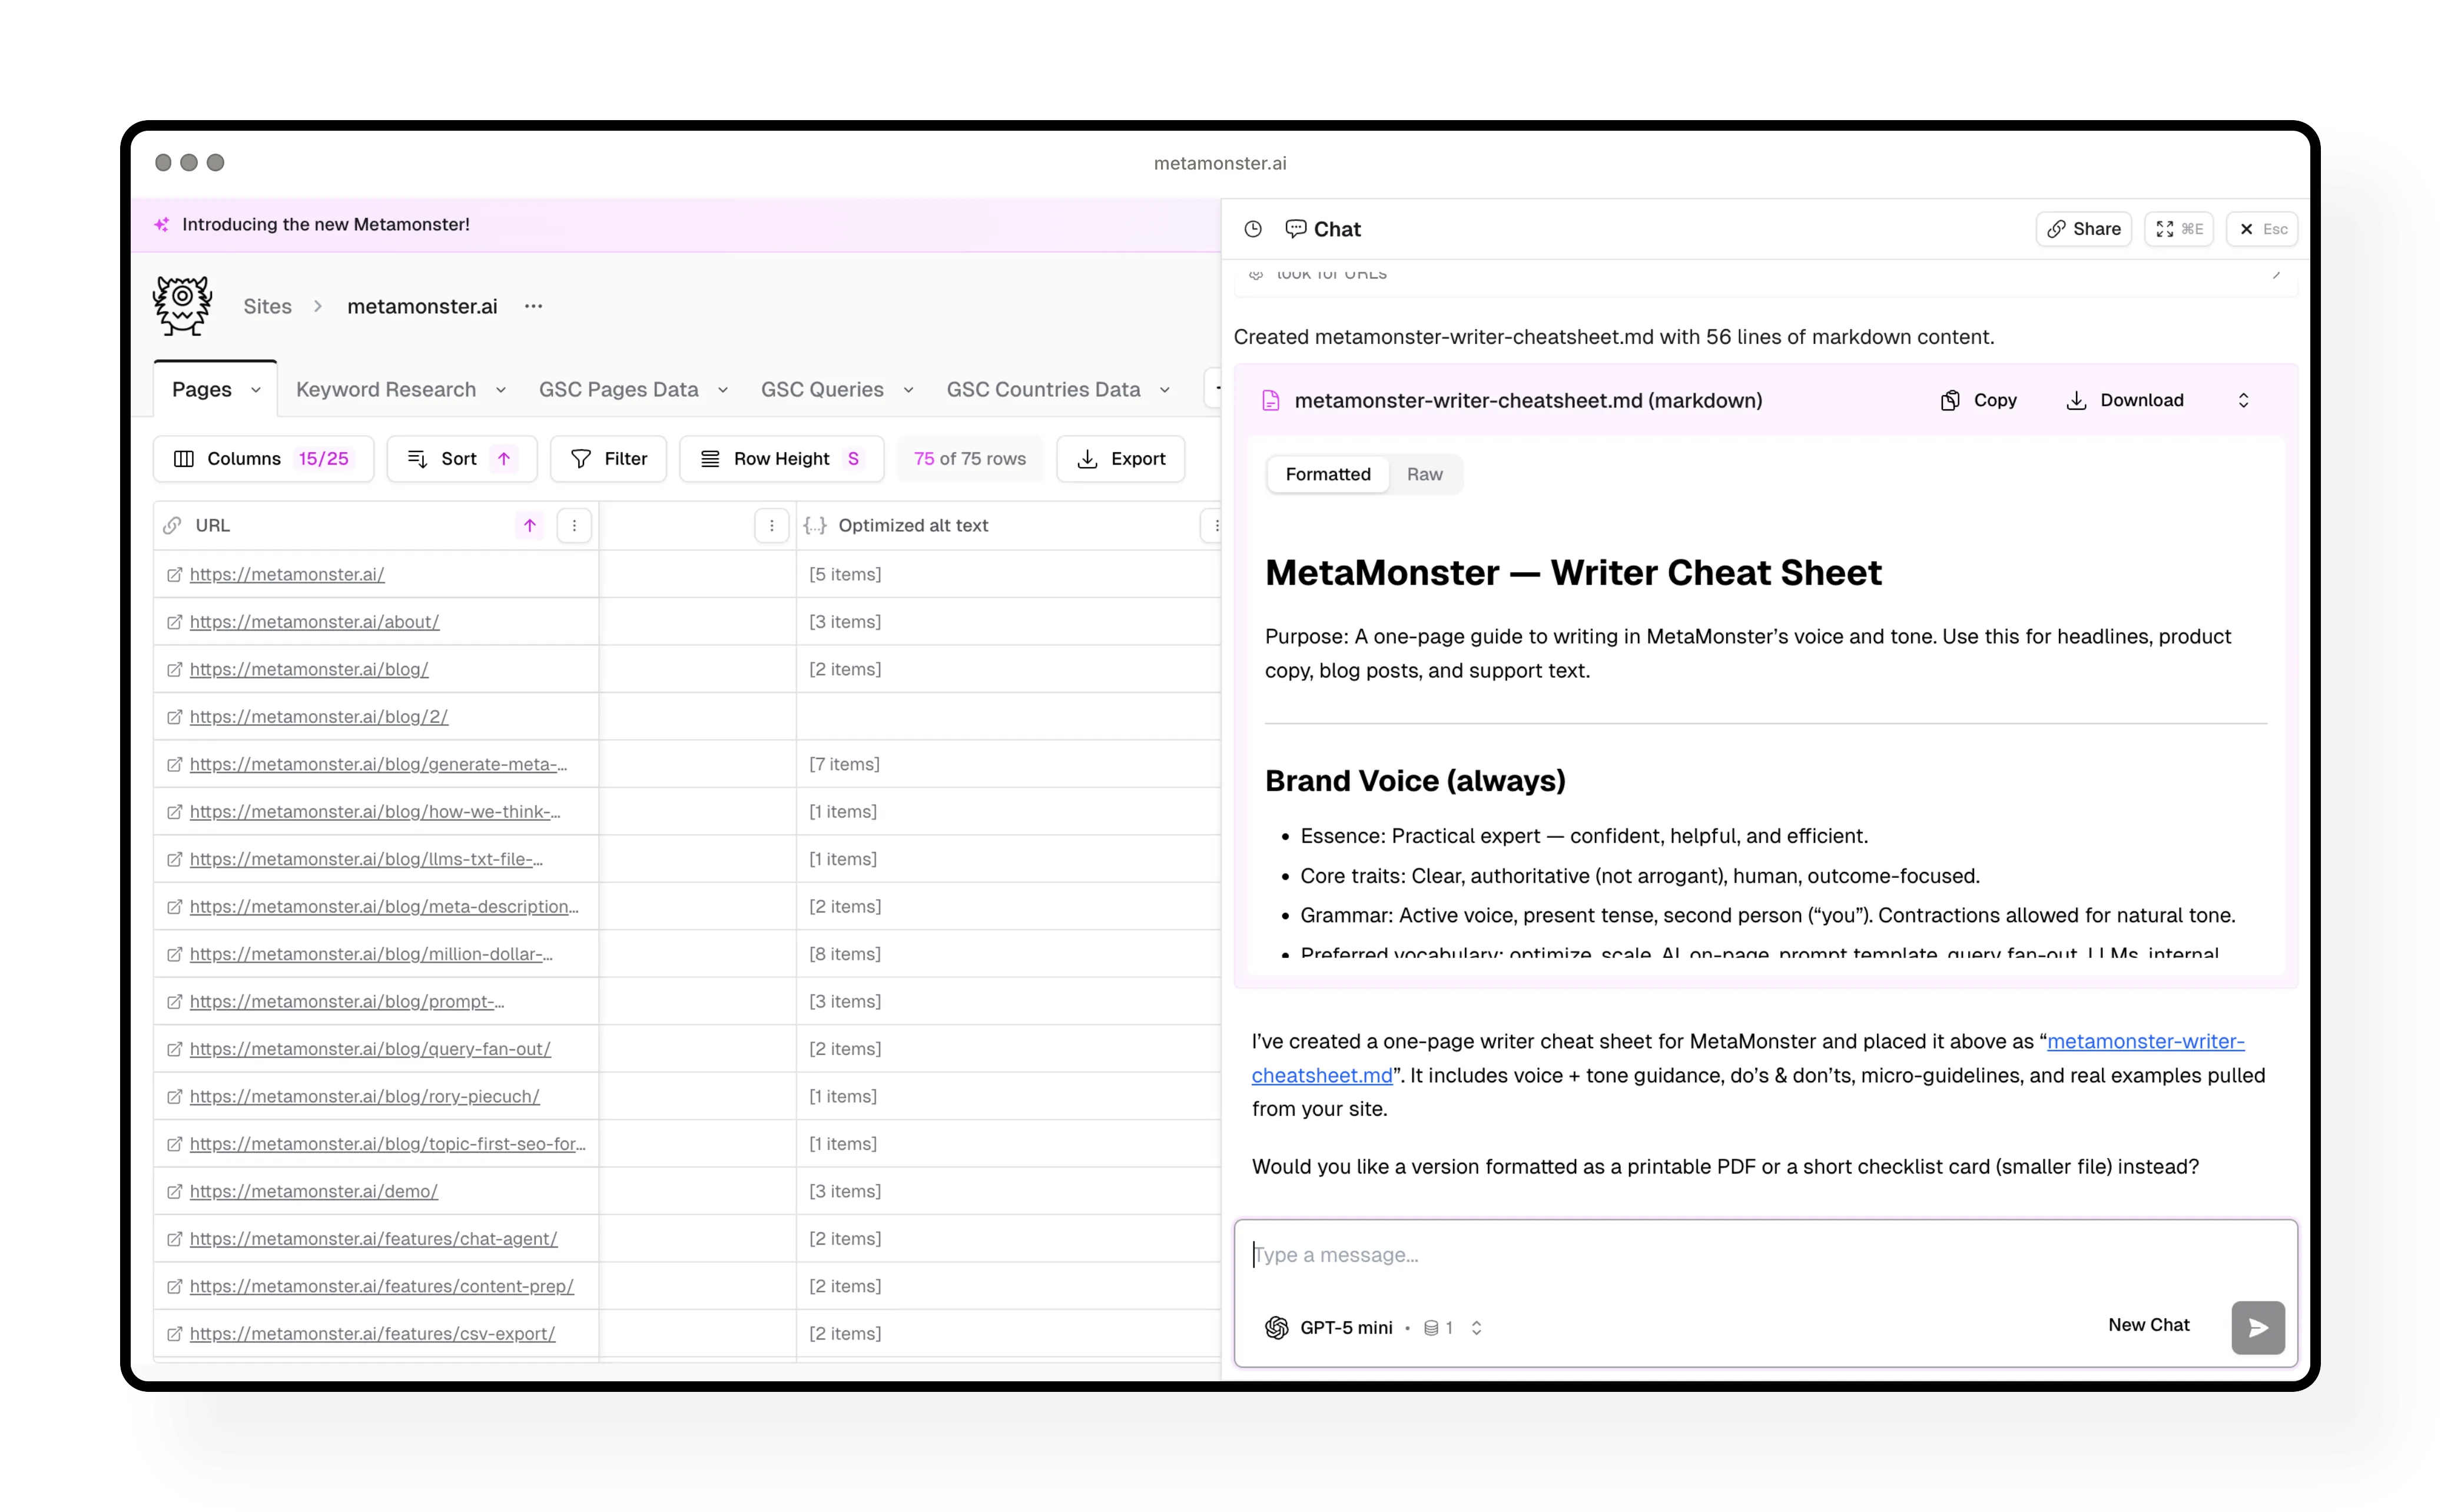
- Generate voice and tone guides from your existing content
- Run content gap analysis across your entire site
- Identify pages that need refreshing
- Conduct SERP analysis
- Workshop new prompts before building them into workflows
Example: Generate a voice and tone guide → ask the agent to create a downloadable markdown version → use that guide in your future content creation.
The chat agent has special tools for creating markdown files and CSVs, making it easy to export useful artifacts you can use elsewhere.
Step 10: Export your optimizations
When you’re ready to implement your optimizations, you have several options:
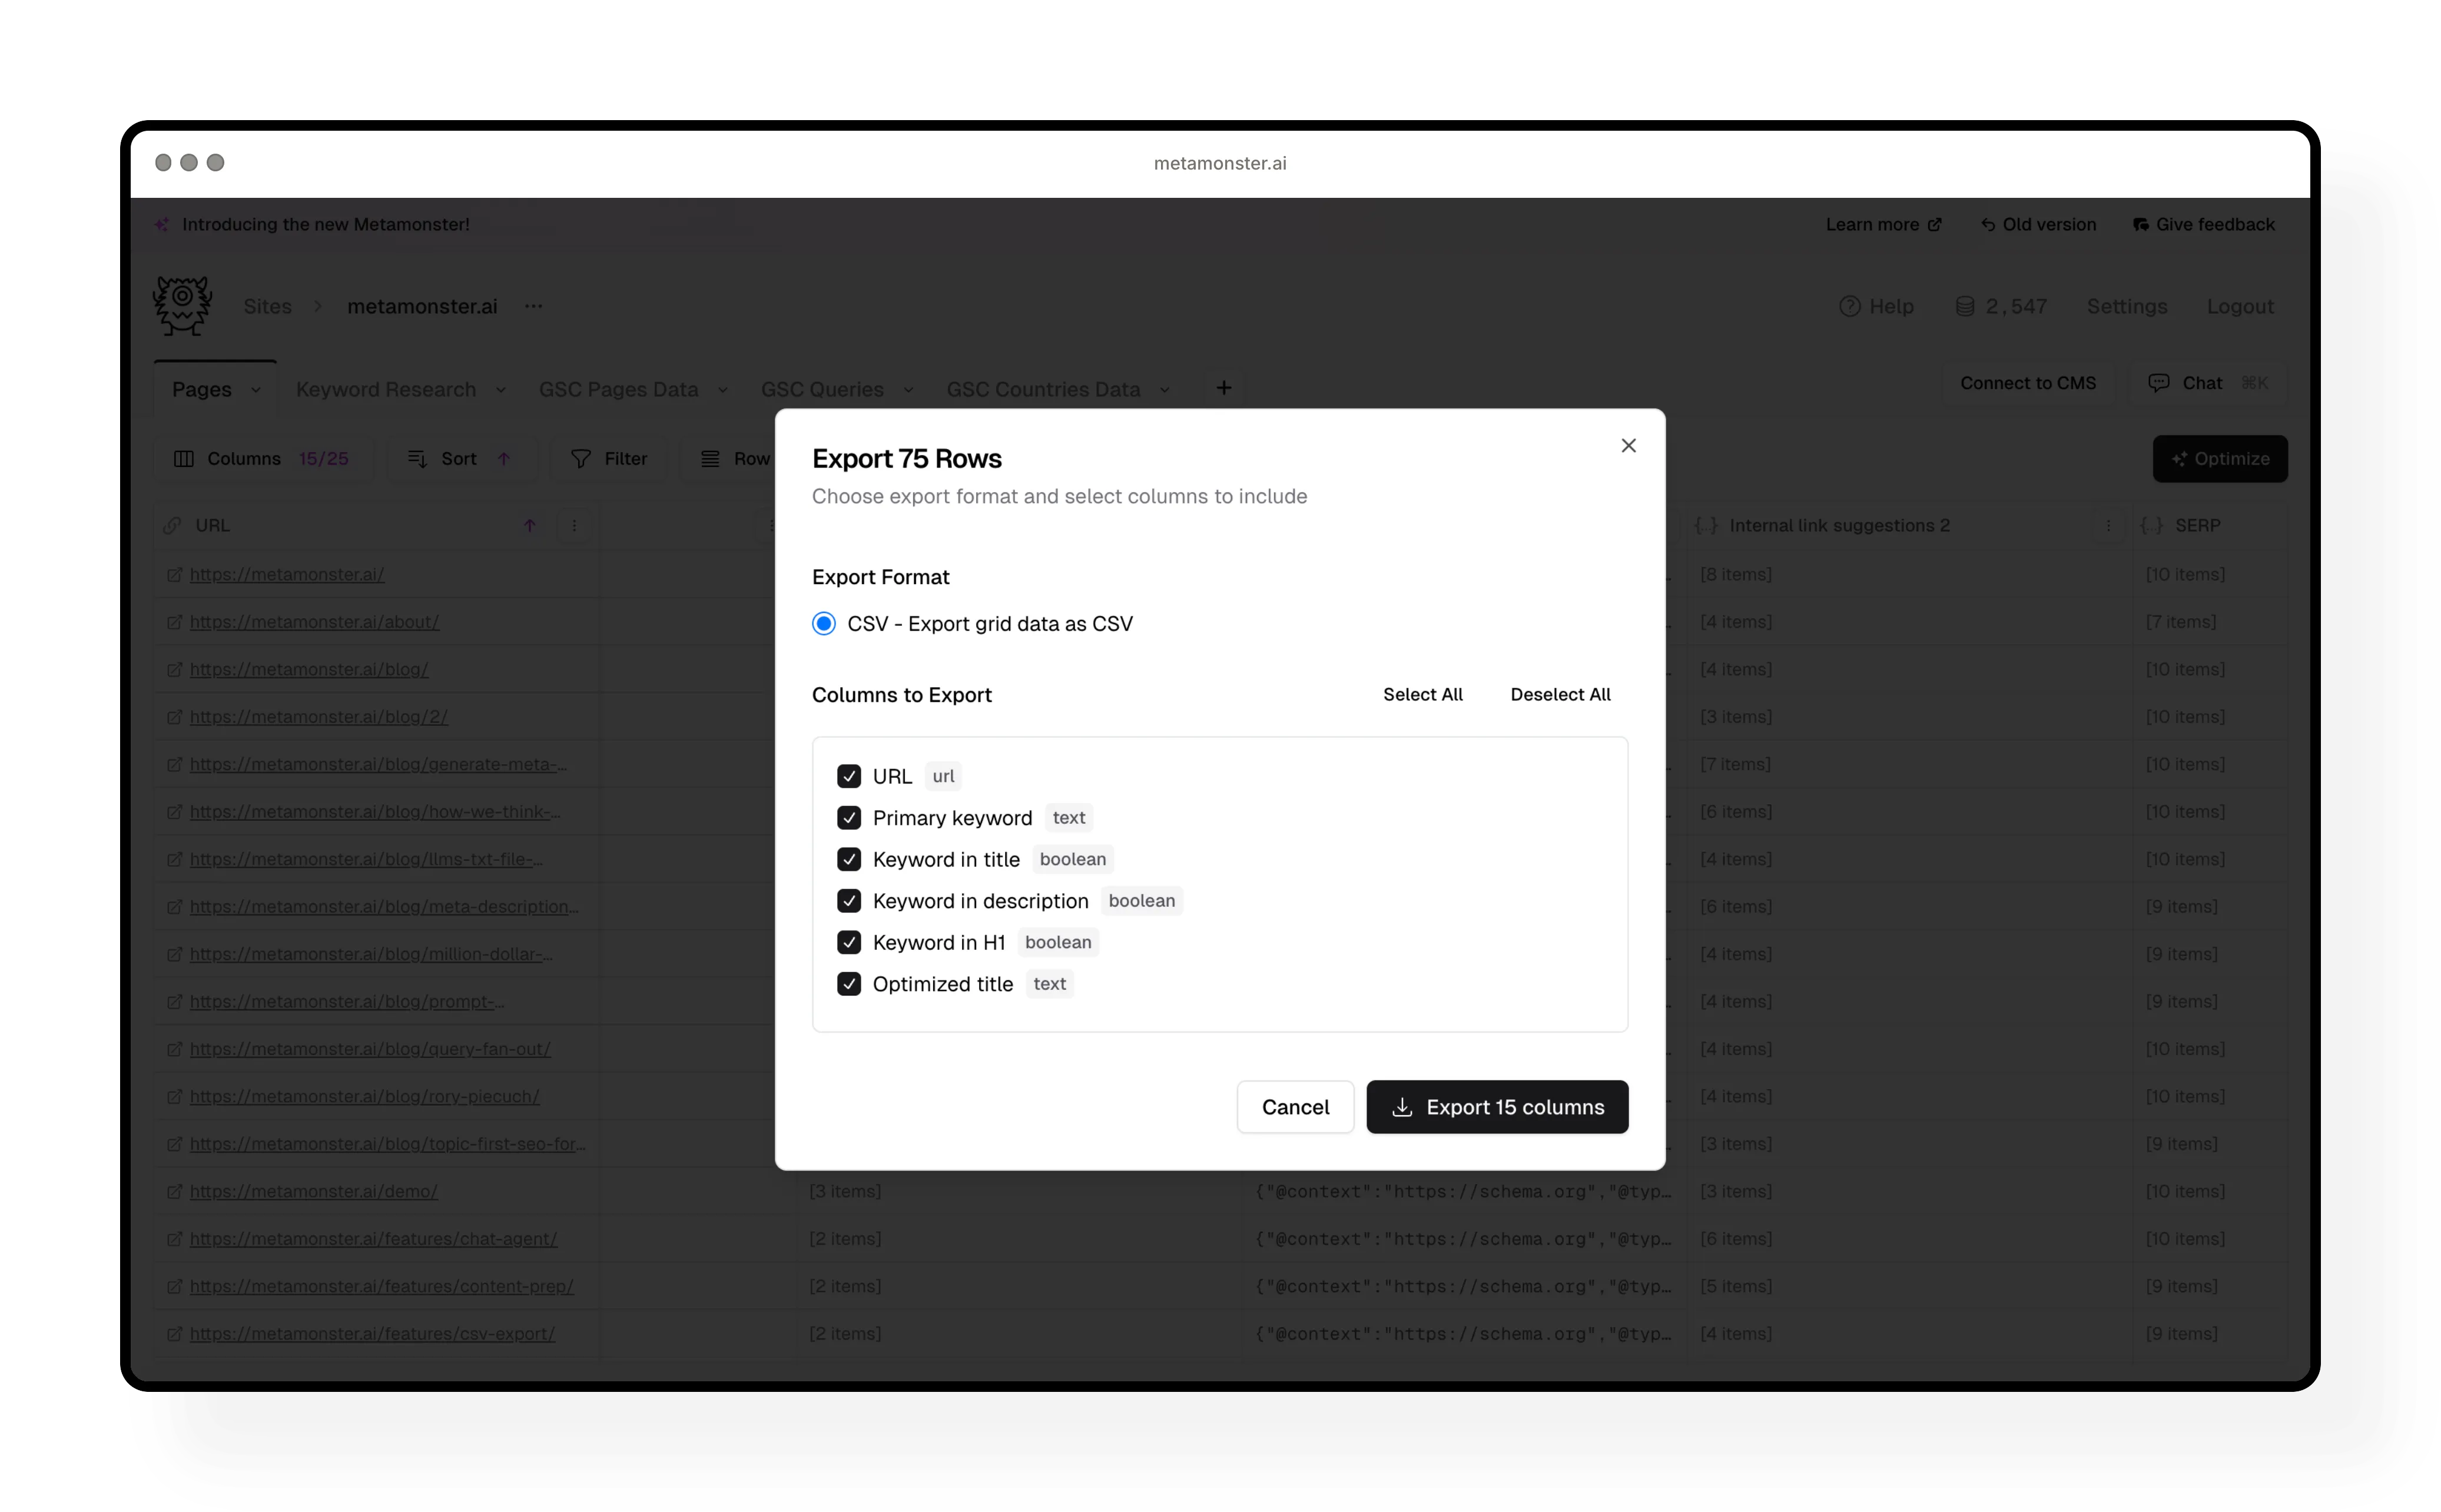
CSV export: Download your entire grid with any columns you choose. Perfect for handing off to your team or client.
Copy individual items: Use the copy icon to grab single titles, descriptions, or other elements one at a time.
CMS integration: Connect to WordPress (with more integrations coming soon) to sync your optimizations directly. Currently supports page titles and meta descriptions.
Coming soon: We’re expanding the WordPress plugin to sync everything you create in MetaMonster, plus adding Webflow and Shopify integrations.
Need more help?
Can't find what you're looking for? Email us at support@metamonster.ai or chat with our team.